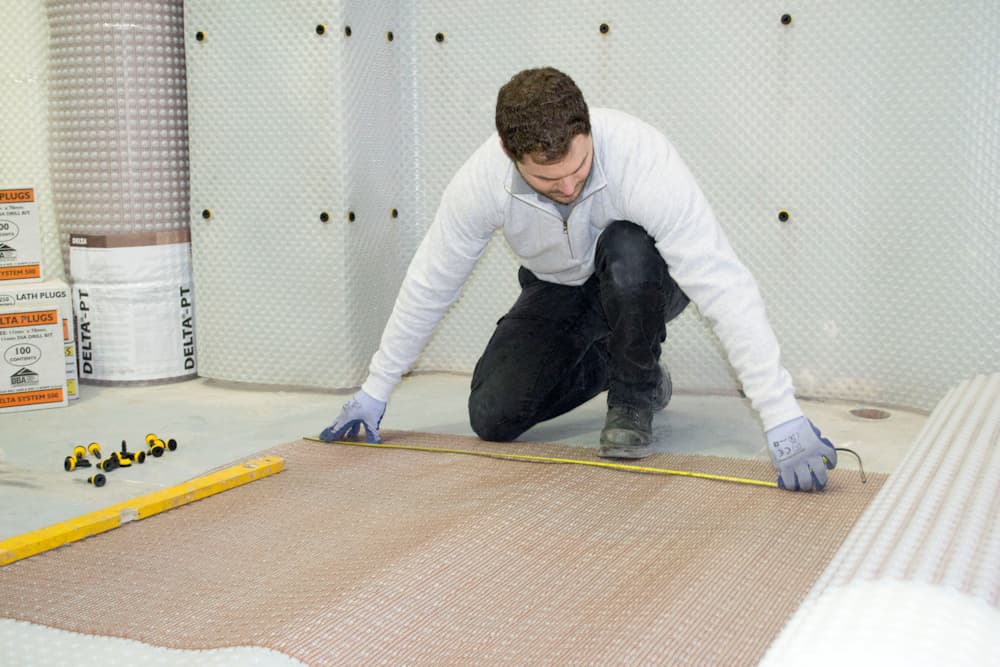
Delta manufactures some of the most versatile and high-performing waterproofing membranes on the market. Designed by experienced waterproofing specialists, Delta membranes have a strong reputation with construction professionals, architects, surveyors and those working on large-scale waterproofing projects.
One characteristic that reflects this industry input is ease of installation. Whether waterproofing a wall or floor, internally or externally, fitting Delta membranes is quick and intuitive. As official Delta Waterproofing stockists, we have created this Delta membrane installation guide to outline how to fit the key floor and wall membrane products in the Delta range.
Delta MS Membrane Installation
The Delta MS membrane range includes two multi-application cavity drain membranes that can be used on floors, vaulted ceilings and walls:
- MS20 Membrane – heavy-duty, 20mm stud profile, maximum drainage capacity, suited to below-ground rooms with significant water ingress.
- MS500 Membrane – 8mm stud profile, suited to light water ingress.
Installing Delta MS20 as a Floor Membrane
Delta MS20 is highly resistant to compression, rot, radon gas and efflorescence. It is ideal for sub-ground structures like basements and can be used in different build-ups:
- Delta MS20 + insulation + tongue & groove chipboard
- Delta MS20 + insulation + screed
- Delta MS20 + insulation + underfloor heating + screed
Installation steps:
- Carry out a flood test using a maintainable perimeter drainage channel recessed into the sacrificial screed.
- Ensure the drainage channel is level or angled towards the outlet. Apply an anti-lime coating (Polysil TG 500) to the concrete surface to reduce lime and salt leaching.
- Roll out Delta MS20 in widthways strips, overlapping each sheet by three studs.
- Leave a 5mm gap around floor piping. Fill with Delta Sealing Rope and seal perimeters with Delta Tape.
- Seal the wall/floor junction with Delta Corner Strip.
Installing Delta MS20 on a Wall
The MS20’s 20mm studs allow for significant drainage, making it suitable for high water penetration or flood-risk environments.
- Prepare the wall surface so it is structurally sound and flat. Repair defects, cracks and voids.
- Roll Delta MS20 around the wall, keeping stud lines level.
- At obstructions (pipes, doors, windows), install sheets up to the area and seal with Delta Corner Strip.
- Drill through studs and fix with plugs at ~900mm centres if attaching to masonry.
- Re-mount switches or electrics after installation.
- Install perimeter drainage and floor membranes.
- Add further build-up layers as required.
Installing Delta MS500 on a Wall
Delta MS500 is a semi-transparent membrane for walls, floors and vaulted ceilings, designed for light water ingress.
- Prepare the wall surface so it is structurally sound and flat. Repair defects.
- Prime the substrate with Polysil TG 500 to strengthen and reduce lime leaching.
- Roll out MS500 vertically or horizontally with studs facing the wall.
- Fix with Delta quick seal plugs. For friable masonry, the clear membrane helps identify fixing points.
- Seal all joins with Delta Tape.
- Fit a drainage channel at the base where the membrane meets the drainage route.
- Seal wall/floor junctions with Delta Corner Strip to create a vapour barrier.
Installing Delta MS500 on a Floor
MS20 is the preferred floor membrane, but MS500 can be used where head height is limited. Installation follows the same steps as MS20.
Delta PT Mesh Membrane Installation
The Delta PT Mesh Membrane is an 8mm meshed-face membrane suitable for above and below ground use. It creates an air gap that channels water to the drainage system or, above ground, allows ventilation behind the wall. The mesh surface bonds directly with wet-applied finishes such as plaster or render, saving space and isolating finishes from damp masonry.
Typical build-ups:
- Delta PT Mesh + dab adhesive + plasterboard + skim coat
- Delta PT Mesh + render coat + skim coat
Installing Delta PT Mesh on a Wall
- Prepare the wall so it is sound and flat. Repair defects.
- Cut vertical sheet sections to wall height and roll out.
- Overlap sheets at the non-meshed edge and fix with Delta PT Plugs with grommets at 250mm centres.
- Ensure the membrane is tight to the wall with no bounce or flex (requires more fixings than MS500).
- Seal overlaps with Delta Tape and cover with Delta Fleece Tape to accept render.
- Once installed, all future services must be surface-mounted.
Installing Delta FM Membrane
The Delta FM Membrane is a high-compression, low-profile floor membrane (4mm studs) for damp proofing existing concrete surfaces. It is ideal where head height is restricted and is compatible with underfloor heating.
Installation steps:
- Measure and cut sheets to width, laying them stud-side down.
- Apply Delta Tape along the flanged edge.
- Overlap the next sheet onto the taped flange.
- Apply floor finishes immediately.
Delta Membranes at Waterproof & Dry
At Waterproof & Dry, we stock a wide range of Delta membranes for floors, walls and vaulted ceilings. As the UK’s only official online Delta supplier, we offer fast UK delivery in 1–3 working days.
For more information, browse our full selection of Delta basement waterproofing membranes.
